![]()

It’s here, it’s finally ready, a starting point, something to use as a launchpad. I’ve finally finished the VM… ok well not finished, I’m hoping this will be an ongoing project, but now at least there is something to show for it, for people to download and modify, test or do whatever else they want with.
So firstly if you want to use this you need to download the VM image (the button that says “download VM image”) once that is done, extract it, load up virtual box, under “file” there is an option to “import appliance”. It’s as simple as that, now you have no reason not to test and play with this.
Before I get in to using and modifying this, any kind of tutorial or advanced topic I’ll give you a quick overview of what I have done so far. Hopefully show you a little of how I have set it up, and maybe some usage scenarios. After that I will go over some first run steps that you should do before using it:
Overview
Firstly the user accounts that are enabled in this project are:
(username – password)
root – root
monitor – monitor
webgui – webgui (Accessing the web terminal)
root – root (MySQL username & password)
As you would expect these are set insecure, just to be remembered easily, one of the first things you should do when setting this up is to change the passwords for these accounts.
Now it’s time for the fun stuff, programs that are installed… As I’m sure you are aware, but you might not be, this was created from a Debian ISO, a completely blank OS, I used the “Small CD” version and this is in i386 format. The base install was set up with the UK in mind (keyboard layout, mirrors, timezone etc.) but that is fairly trivial to change to your region if needed.
One of the first things I did was install/create a GUI for the root account to use, just to make things simpler. To do that I installed:
openbox – Window manager, uses little resources and is highly customizable, once you are logged in as root just type “startx” and it should load the GUI.
tint2 – Lightweight taskbar/panel, also highly customizable and uses few resources.
xcompmgr – Lightweight alternative to Compiz Fusion for creating shadows and transparency.
nitrogen – Application to enable and manage desktop backgrounds.
conky – System monitor for your desktop that’s incredibly customizable.
Now that the GUI is all set up it’s time for the programs I have installed, I will try to group these also, and although this is minimal, expect it to expand as this project grows.
ntpdate – For keeping the clock in time
kuser – GUI for managing users and groups
localepurge – Delete unnecessary files (keep overall space requirements small)
zerofree – Fills unallocated, non-zeroed blocks with zeros (for compressing the image after)
gedit – Text editor
nautilus – File browser
iceweasel – Web browser
fail2ban – Block login requests after x tries, used as a security precaution against brute-force attacks
htop, iftop, apachetop & screen – As described in the previous article “Monitoring”
multitail – for monitoring multiple log files at once
apache2 – Web server, you should know what this is, it’s the main ingredient of this project
php – Scripting language for creating dynamic content and interfacing with the database
mysql – Database (“The world’s most popular open source database” – mysql.com)
Setting up
Hopefully now you have downloaded and got the virtual machine up and running and it’s time to prepare it for “real-world” use. The first thing your going to want to do is change the default passwords. Log in with the username root using the password root and run the following command:
passwd root |
Follow the on screen instructions to change the root password, then do the same for the account monitor
passwd monitor |
Now to change the MySQL password, run the following
mysql -u root -p |
Supply the password when asked (which is still “root”), then run:
UPDATE mysql.user SET password=PASSWORD('newpassword') WHERE user='root'; |
Once that has been accepted just restart the MySQL server for the changes to save:
/etc/init.d/mysql restart |
Lastly it’s time to change the webgui password (and corresponding mysql) to do this you need to navigate to the “/var/www/default/php” directory and open cmd.php with your text editor of choice. You will want to change $mainname & $mainpass to the login credentials you would like, and change $mysql_user & $mysql_pass to reflect the new MySQL details.
Now you are ready to log in and start using it as you see fit. You should have something that looks like the following:
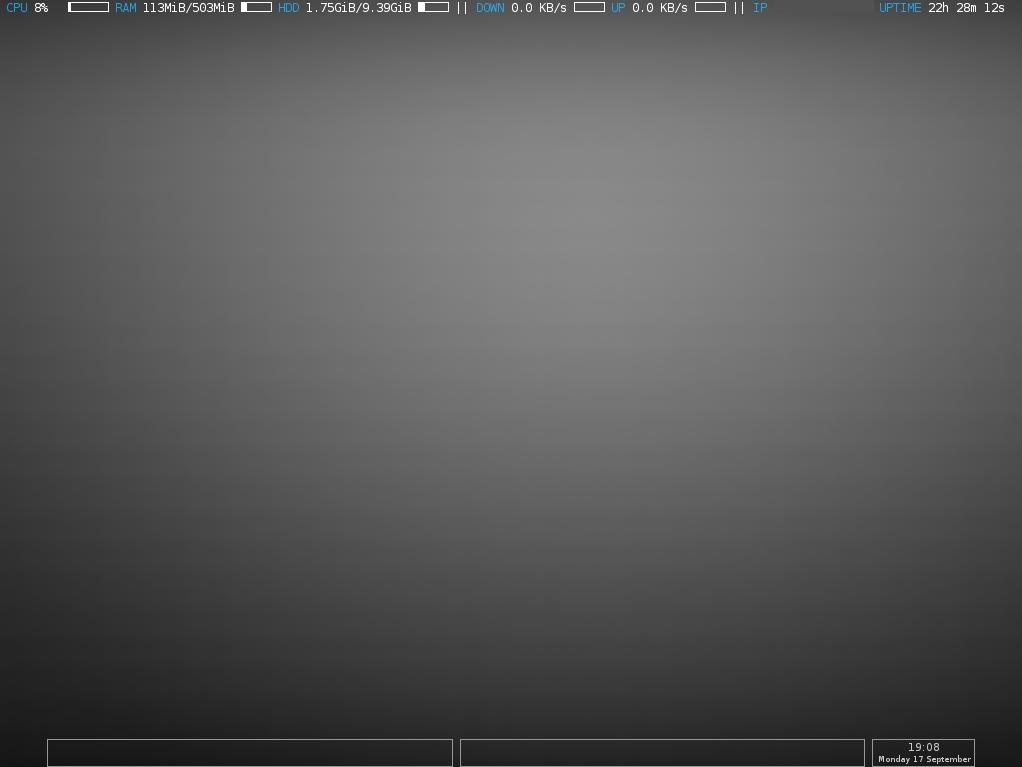
-

- Default desktop GUI
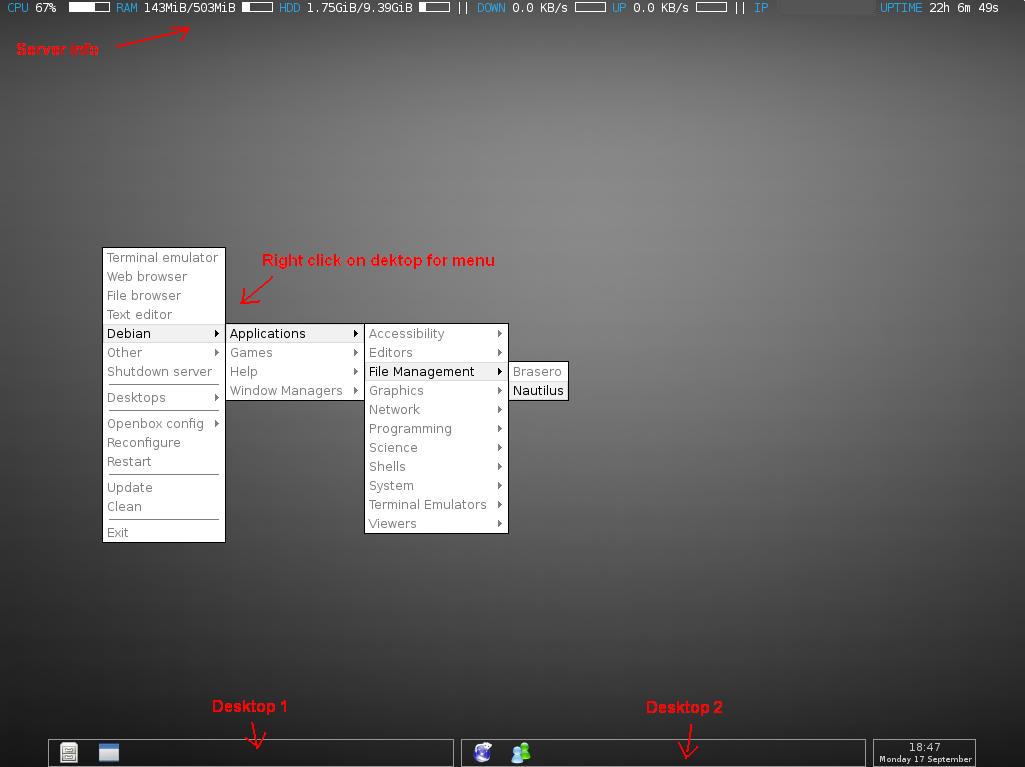
-
- Desktop GUI guide
-
- Default website

-
- Default website prompt

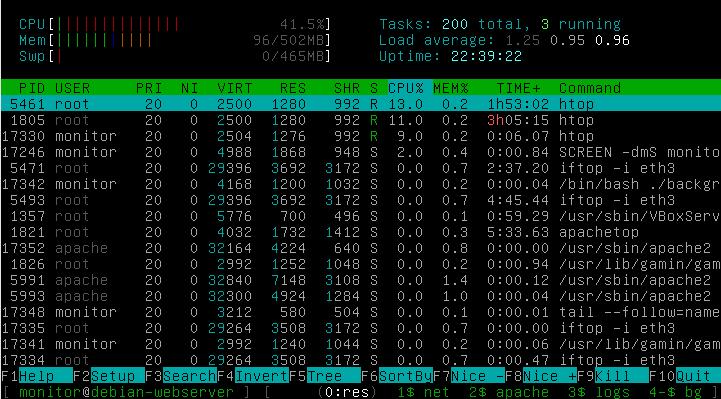
-
- Monitoring resources
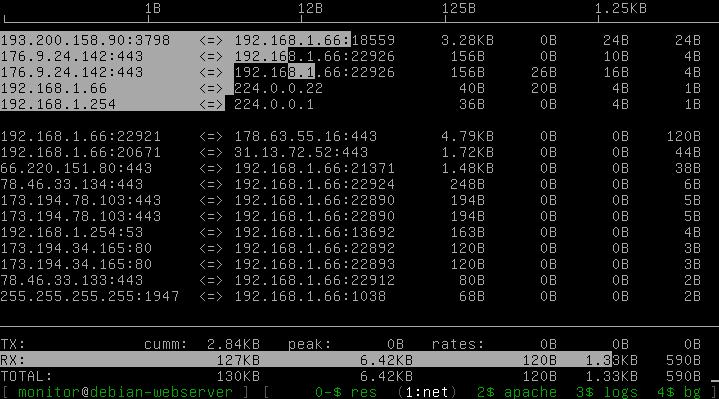
-
- Monitoring network
-
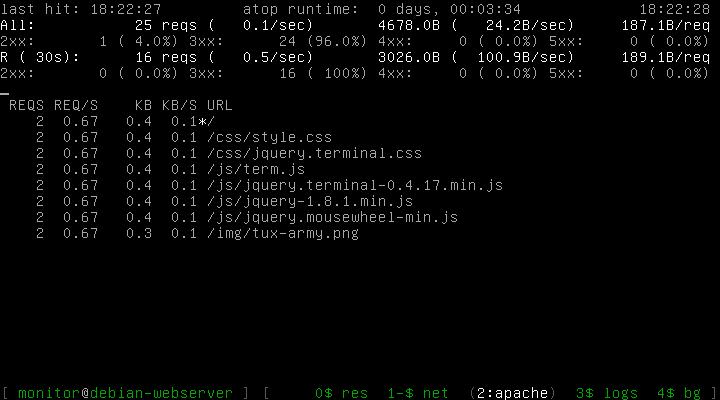
- Monitoring apache
-
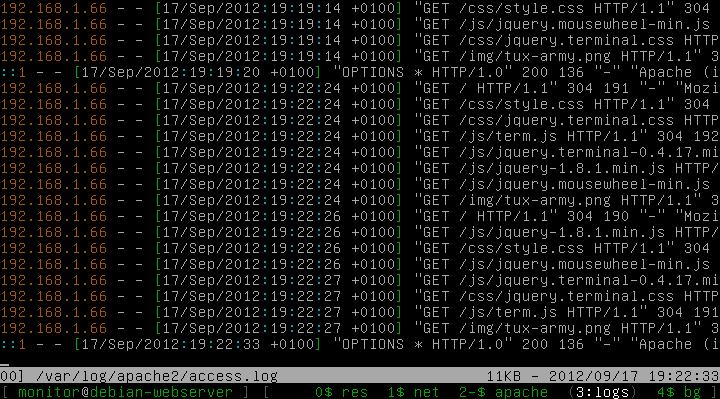
- monitoring logs
Notes
The web gui – if you type in the address of the browser the IP of the VM (LAN IP) you should get the default webpage with a picture of a penguin (as seen top left of this post) this would be the default website on the server /var/www/default. What you might not realize is that if you press the ~ key a drop down terminal should appear, this has some basic commands programmed in, and I will add to this as the project goes on.
If you are using this server for just one website you would store the scripts in /var/www/default however if you are using this as a shared hosting server this would be the default website served.
I have also added multitail to the monitoring script (as seen in the screenshot above) using the command:
multitail -mb 2KB -p r -cS ntpd --mergeall /var/log/auth.log --no-mergeall -cS apache --mergeall /var/log/apache2/access.log --no-mergeall -cS apache_error -p r --mergeall /var/log/apache2/error.log --no-mergeall -cS mysql --mergeall /var/log/mysql/mysqld.log /var/log/mysql/mysql-slow.log$(printf \\r) |
The next article will be expanding and securing this server to be a shared web host, it is already partially set up to do so. if you log in as root and startx to get to the GUI then you can load the web browser and try to go to http://www.example.com, as you might notice the website stored in /var/www/example.com will be served.
I would love to know what services you would want in a shared hosting environment, what packages you would use, any vulnerabilities I may have missed, anything you would do differently, a comment would be appreciated.
I hope you enjoy and use this:
![]()
