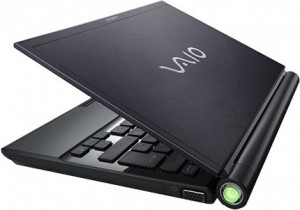
 My laptop, as you may have guessed, is a Sony VAIO TZ series (specifically VGN-TZ31VN) Not a cheap piece of equipment, I got it on the same month as it was released. There are a lot of people that absolutely hate VAIO’s, myself, I love it, it has all the components you could want for what I do, a wireless card that can be put into monitor mode, a small form factor, a long lasting battery (which yes was an optional extra, but an extra not many other laptops have) also for sentimental reasons – it’s the first laptop I have ever owned.
Recently the fan in the laptop was making a horrible grinding noise, it sounded like it was on it’s way out.. my beloved laptop dying! – not something I would allow to happen without putting up a fight.
After a lot of googling I discovered a place that would supply a replacement for £35 I decided I might as well see what I can do, if I get something wrong it wont really matter since I could buy a replacement.
So here is how I repaired my fan for next to nothing. Firstly – the things you will need:
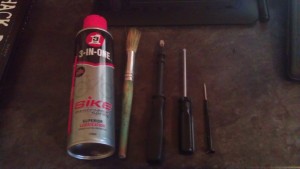 From left to right:
– Lubricant 3-in-one will work fine, what you really want is a silicone based lube. GT85 for example. WD40 is a big NO NO – it will corrode the plastic and is not suitable for this.
– Paintbrush, for wiping clean dust
– Flathead screwdriver
– Phillips screwdriver
– jewelers screwdriver (some screws require this)
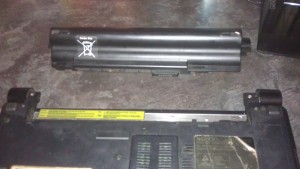 It may seem obvious, but you want to remove the battery
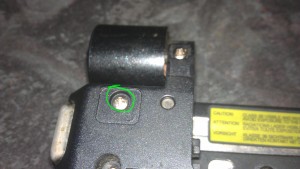
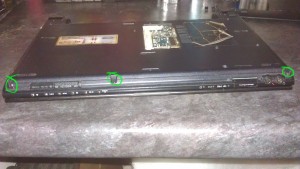
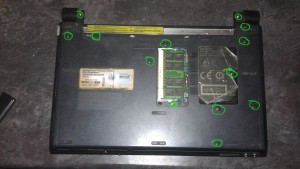 Remove a whole load of screws as circled here in green. This includes the cover for the RAM
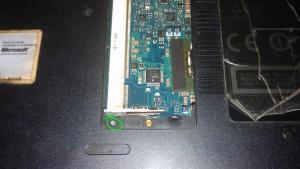 Remove the RAM and the screw near it. Now it’s time for the “secret” screws
The first “secret” screw is on the top left hinge under a square rubber foot type pad.
The next three are also located under hard rubber pads that are flush against the case.
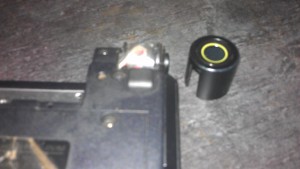 This is where the flathead screwdriver comes in handy. Use it to gently pry the right hand (power cable side) hinge cover off, it is just secured with some plastic clips.
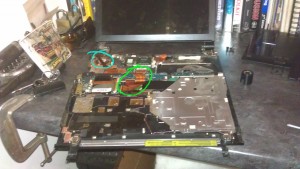 It should be fairly straight forward to open the keyboard and trackpad from the base now, The keyboard/trackpad will be secured to the motherboard (as circled in green) the easiest way to remove this is just to pull the motherboard side connector, which just pops on and off. Circled in light blue is where the fan is located.
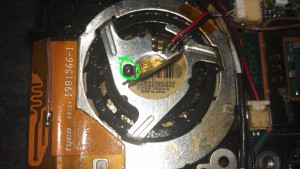 Underneath the sticker is a small hole which gives you access to the bearings and is where you should put the oil. Clean the fan out with the paintbrush and make sure everything is working, you should be able to test it by spinning it with your finger.
Once this is all done, you can put your laptop back together, following the previous steps in reverse. If you have cleaned it and oiled it and it is still not working properly then you will need to replace the fan (which means dismantling the laptop entirely, since the fan is connected underneath the motherboard)
Obviously I have done this to my laptop and it has been working perfectly and silently since. I imagine this should last quite a while longer.
After doing some research on the fan it seems that is was shipped with oil that evaporates (not silicone based) I can only presume this is so you have to send your laptop back for repair or a replacement fan.
I hope this article has helped, and as always, likes, shares & comments are always appreciated.

Hi there, very interesting story. I have the same model and there is a problem with the motherboard, could you please advise the place that you found?
thanks
this was a while ago now… if you google for “sony vaio TZ parts” there are a few companies in the UK that supply them, other than that your best bet is probably ebay
Pingback: エアマックス 2010
Pingback: SEO
This is a useful article. However the point described to lubricate is nothing more than a solder joint. Looking at the last picture in the sequence of the fan and casing…
Here’s what you can do, you can remove the actual fan by teasing up the three casing clasps that secure the fan assembly to the fan casing. If you look at the picture, you will see the clasps that are bent over to hold it at 11.30 and 3.30 and at 7 in the brown stick on circuit strip. Lift these up with a screwdriver carefully to release the fan assembly, then just out of picture at 1 o’clock there is a screw that you must undo (you will find it tucked away under the cables that pass over the black and red lead, leading away from the fan assembly at 1’o’clock. Then starting at the bottom carefully lift and tease the brown circuit strip up and away (it is stuck down like tape). Then you can lift the fan assembly like a trap door, careful up (it is still connected at 1) where the wires come out. Once vertical just pull the fan away from the assemble to reveal the coils and bearing underneath, a magnet holds the fan down so there will be some slight resistance. Then you can inspect the bearing, lubricating or replacing as required.
Careful re-assemble making sure the fan doesn’t foul the casing before pressing the clasps in the aluminum casing back down. At this point start the pc (with the power plug in or battery replaced), test the fan for noise and adjust casing to fan assembly clearance. If still noisy despite all adjustments, then perhaps a new assembly needs fitting.
Thats makes more sense, I did in fact end up replacing the whole assembly. Thank you for the info, if it happens again I’ll take some more pics and update this post adding your method 😀
Yes, it certainly beats removing the motherboard and myriads of connectors, screws, cables and tape. Then you have to disconnect and pries off the copper heat-sink then use heat transferring paste on the new processor / heat-sink bond. Phew….!!!
If you haven’t already considered SSD upgrade for the VGN-TZ31 then I strongly recommend doing so. Replacement costs about £80 via Ebay. Contact at KingSpec who make the PATA zif SSD is joanna.wang@kingspec.com
Use Ghost to create an image of your existing hdd for transferring the image to KSD-ZF18.6-128MS.
Windows 8.1 runs nicely on vgn-tz31 but you need to link up the older drivers from XP and Vista to get the various devices in Device Manager sorted. The camera is tricky in the Imaging devices section Sony Visual Communication Camera VGP-VCC7.
I have not been able to get the WWAN working as all the software from XP and Vista is incompatible (unless anyone has a solution!) Also the TouchStrip Fingerprint Sensor needs some software to make it usable. Ricoh memory drivers for SD and Pro MagicGate are those from XP. See sony Support website.
The SSD upgrade increases read speed by 7x using CrystalDiskMark. This restores the PC to a great little bit of kit.
Hi, i have tz47cn, with win 8.1 upgrade 1, all stuff works, except bluetooth, and shutdown has to be done manually.