About the base station
Before diving straight in and hacking a pacemaker we will start by attacking the base station. The pacemaker talks to the base station, this is a small box that is left beside the bed. At night, this device communicates wirelessly with the pacemaker to collect information like heart rhythms and device performance. It then uploads this data to a remote network that the doctors have access to. This allows the doctor to monitor the patients pacemaker health remotely and check how well it is working without needing to visit the hospital frequently. It’s a simple way to ensure everything is functioning correctly.
The plan is to hack this device to understand the communication between it and the pacemaker to see it that can be replicated and if the communications are secure. As a side goal it would be interesting to check the following:
- See if the device is secure both physically and in the software implementation
- See if there is PII stored on the device
- See how it communicates to the remote network and how that is implemented, is it secure?
OSINT
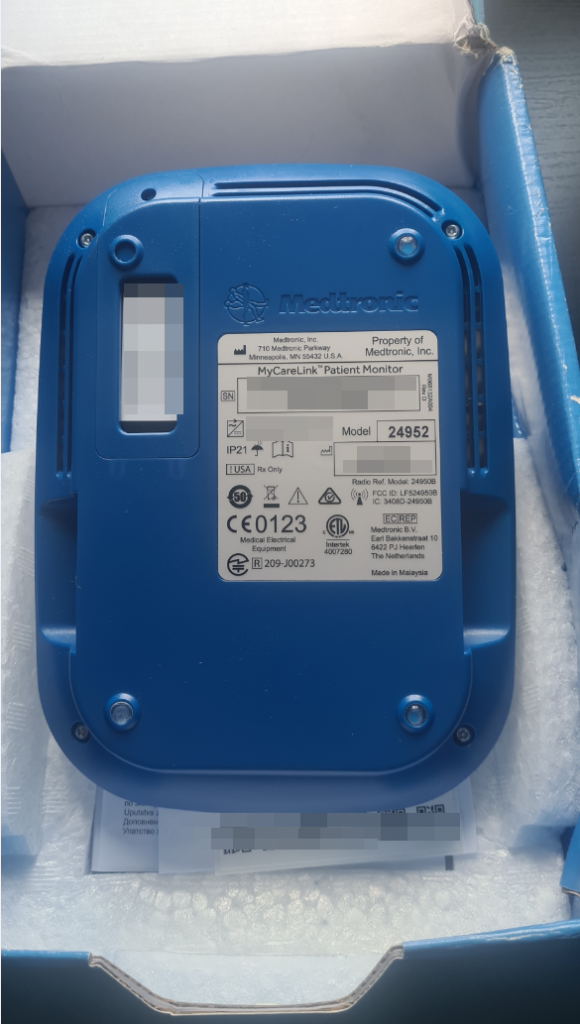
One of the first things to check before opening the device is any public documentation, user manuals are available online helping with how to use the device, there are no default credentials in it. Since the device is sold in America and uses radio communications it is required to pass FCC checks, these documents often contain useful information, this device had the following FCC docs: https://fccid.io/LF524950B unfortunately there wasn’t anything too useful here from a pentester perspective, some of the frequencies are confirmed and there are some internal photos, but that is about it.
Hardware tare-down
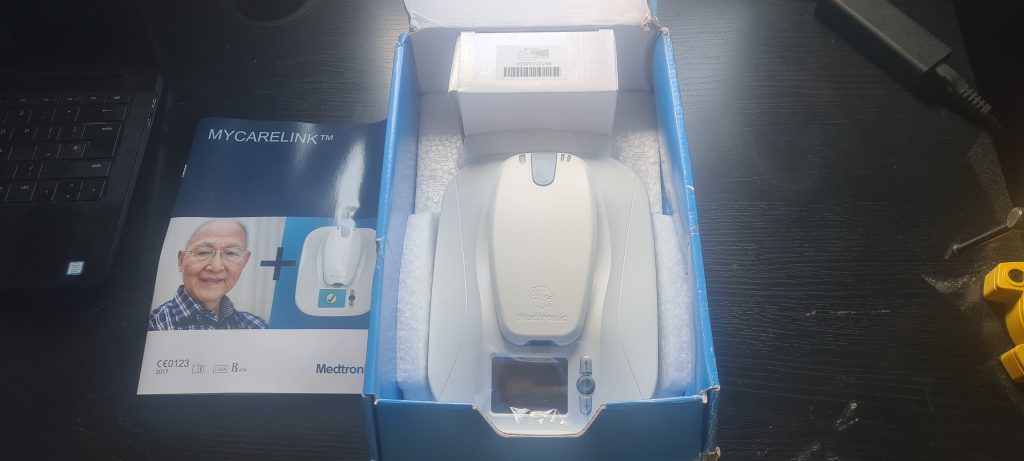
Firstly lets see what I got!
The handset on top will be for another blog post, this one will only focus on the base.
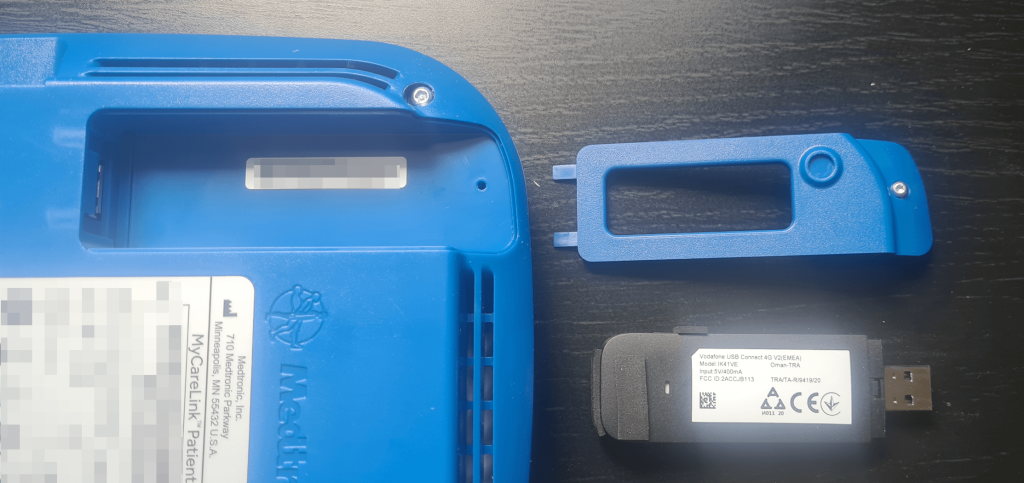
It did contain a USB 4G modem with a Vodaphone SIM card
Security screws
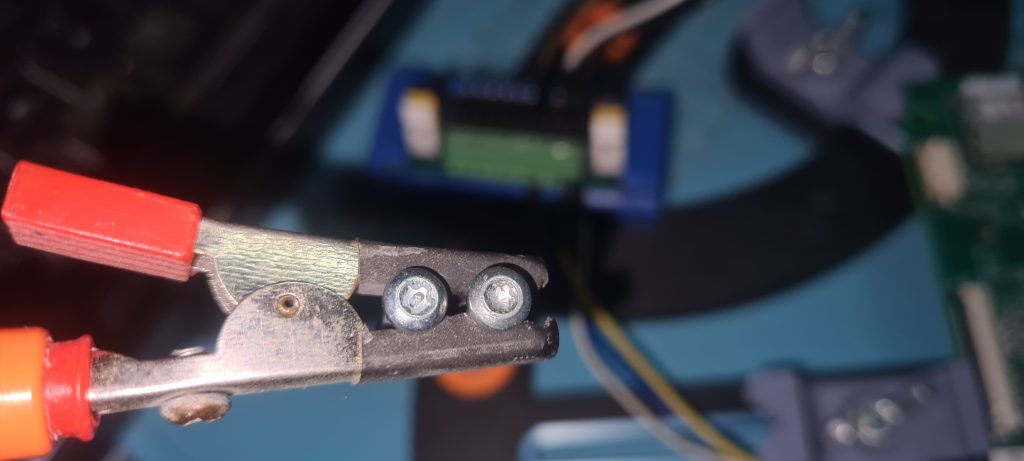
Getting access to the PCB was a pain as they used a couple of different security screws: standard 6 point t8 torx and a more annoying 5 point with center pin torx (I had to buy specific bits for these!)
Component identification
Now we have this open lets see what parts it’s using:
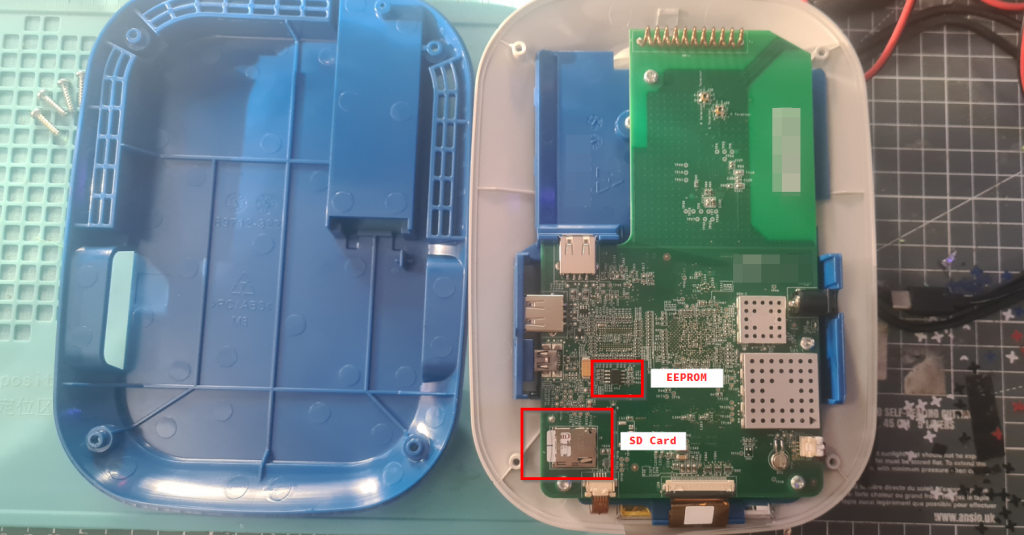
PCB Front:
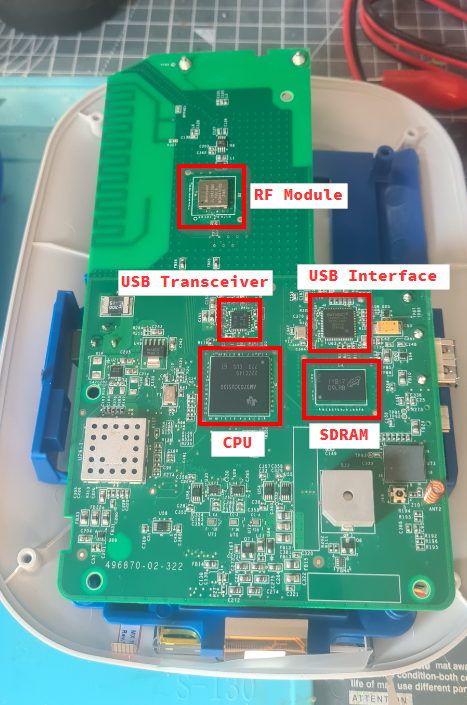
PCB Back:
CPU: AM3703CUS100 – Texas instruments CPU (ARM Cortex A8 – 1 core, 32 bit 1GHz)
SDRAM: IYB17 D9LRB – DRAM MOBILE DDR 1G @ 200MHz
USB Interface: SMSC LAN9512-JZX – IC USB 2 Port Hub Int 10/100 Ethernet
USB Transciever: T1210b
https://www.ti.com/lit/ds/symlink/tusb1210.pdf
RF Module: Microsemi ZL70473MN – Low-Power RF Module for Implant Applications
https://www.microchip.com/en-us/product/zl70323
EEPROM: 24256E – 256k
https://www.onsemi.com/pdf/datasheet/cat24c256-d.pdf
SD Card: Sandisk 1GB MicroSD
UART discovery and modification
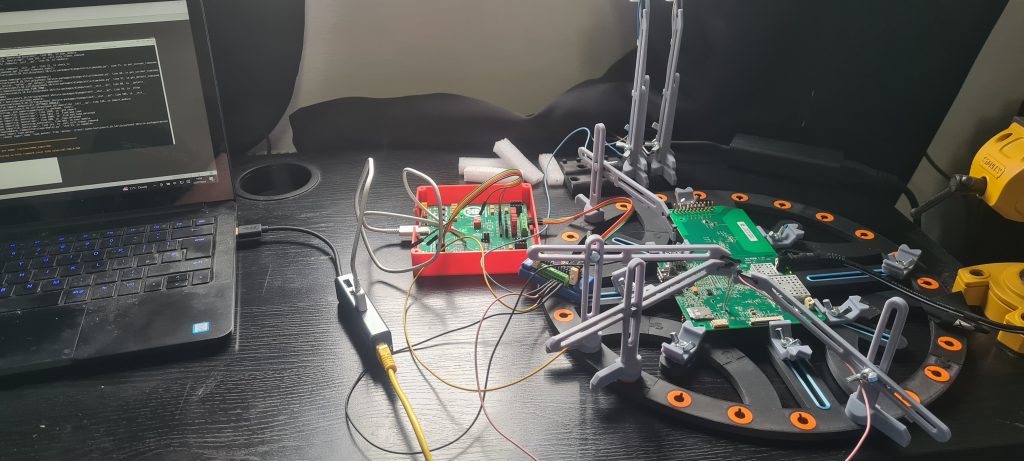
Recognizing the footprint of the unpopulated component on the PCB as a UART interface I set up the probes to test this theory:
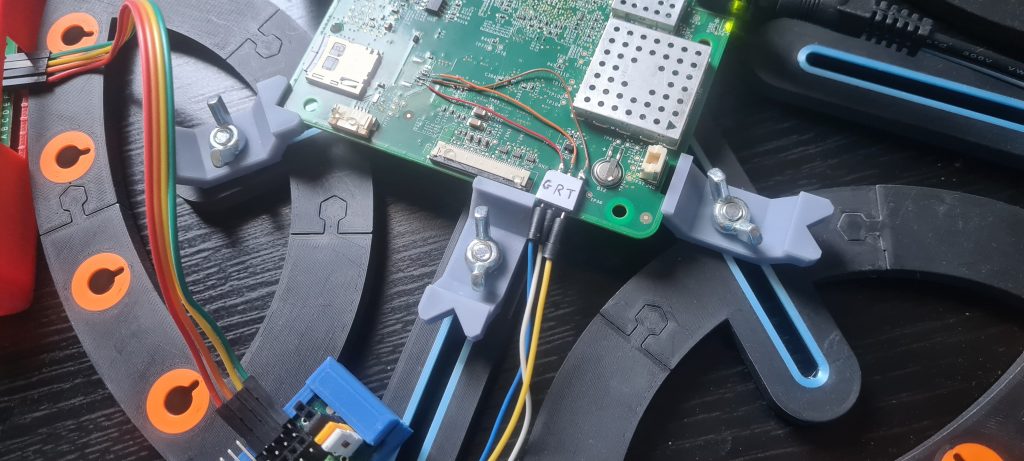
I was correct and saw data in the terminal, so quickly added a more convenient header:
Software inspection
I launch screen to record what happens and reset the device. Low and behold a boot log!
U-Boot SPL 2012.10-rc2 (Jul 09 2019 - 13:47:53)OMAP SD/MMC: 0reading u-boot.imgreading u-boot.imgU-Boot 2012.10-rc2 (Jul 09 2019 - 13:47:53)OMAP36XX/37XX-GP ES1.2, CPU-OPP2, L3-165MHz, Max CPU Clock 1 GhzMDT Vega board + LPDDR/I2C: readyDRAM: 128 MiBMMC: OMAP SD/MMC: 0*** Warning - bad CRC, using default environmentIn: serialOut: serialErr: serialDie ID #649a00029a180000015ec3e90401a004VDD1: 3a, Converted: 1325 [mV]VDD2: 2c, Converted: 1150 [mV]Boot MPU rate: 600 mHzMPU rate switched to: 1000 mHzreading bootimg.rgbHit any key to stop autoboot: 0 SD/MMC found on device 0reading uEnv.txt53 bytes readLoaded environment from uEnv.txtImporting environment from mmc ...Loading file "/boot/uImage" from mmc device 0:23128968 bytes readmmc bootBooting from mmc ...## Booting kernel from Legacy Image at 80200000 ... Image Name: MontaVista Linux 6/3.0.3/ti-omap Image Type: ARM Linux Kernel Image (uncompressed) Data Size: 3128900 Bytes = 3 MiB Load Address: 80008000 Entry Point: 80008000 Verifying Checksum ... OK Loading Kernel Image ... OKOKStarting kernel ...Uncompressing Linux... done, booting the kernel.INIT: version 2.86 bootingPlease wait: booting...mount: sysfs already mounted or /sys busymount: according to mtab, sysfs is already mounted on /sysStarting udevRoot filesystem already ro, not remountingCaching udev devnodesConfiguring network interfaces... done.net.ipv4.conf.default.rp_filter = 1 |
I snipped off the end as theres nothing particularly interesting after.
Things of note from these boot logs:
uboot version: U-Boot SPL 2012.10-rc2 (Jul 09 2019 - 13:47:53) Image Name: MontaVista Linux 6/3.0.3/ti-omap Image Type: ARM Linux Kernel Image (uncompressed)MontaVista Linux 6 .dev-snapshot-20190709 Vega1.2.4p |
I was also presented with a login prompt, try all kinds of combinations to get root, but no luck, after a while I try the name “medtronic” with no password and am greeted with a shell!
Theres not much I can do with this account, but as luck would have it:
medtronic@Vega1:/home/medtronic# cat /etc/passwdroot:$1$X1oVTrRE$Nz6O26Tu0bbCT8uWBjOPz.:0:0:root:/home/root:/bin/shdaemon:*:1:1:daemon:/usr/sbin:/bin/shbin:*:2:2:bin:/bin:/bin/shsys:*:3:3:sys:/dev:/bin/shsync:*:4:65534:sync:/bin:/bin/syncgames:*:5:60:games:/usr/games:/bin/shman:*:6:12:man:/var/cache/man:/bin/shlp:*:7:7:lp:/var/spool/lpd:/bin/shmail:*:8:8:mail:/var/mail:/bin/shnews:*:9:9:news:/var/spool/news:/bin/shuucp:*:10:10:uucp:/var/spool/uucp:/bin/shproxy:*:13:13:proxy:/bin:/bin/shwww-data:*:33:33:www-data:/var/www:/bin/shbackup:*:34:34:backup:/var/backups:/bin/shlist:*:38:38:Mailing List Manager:/var/list:/bin/shirc:*:39:39:ircd:/var/run/ircd:/bin/shgnats:*:41:41:Gnats Bug-Reporting System (admin):/var/lib/gnats:/bin/shnobody:*:65534:65534:nobody:/nonexistent:/bin/shmedtronic::1000:1000:Linux User,,,:/home/medtronic:/bin/shmessagebus:x:11:11:Linux User,,,:/var/run/dbus:/bin/shpolkituser:x:12:16:polkituser:/var/run/polkit:/bin/sh |
YES a root password hash!
root:$1$X1oVTrRE$Nz6O26Tu0bbCT8uWBjOPz.:0:0:root:/home/root:/bin/sh |
I give this to a few mates with better cracking rigs than me and no-one was able to crack it, if anyone reading this is able to I’d be interested to know what the password is.
Getting root
With the “medtronic” account being fairly locked down and no obvious method to root I decided to look into the SD card, plugging it into my windows host I saw it contained 4 partitions, 3 of which didn’t work (will investigate later) but one did! the “boot” partition. In this partition it had uEnv.txt which appeared to have uboot options, I tried the obvious by adding “init=/bin/sh” as usual, but when booting the device with the SD card reinstalled there was no root shell.
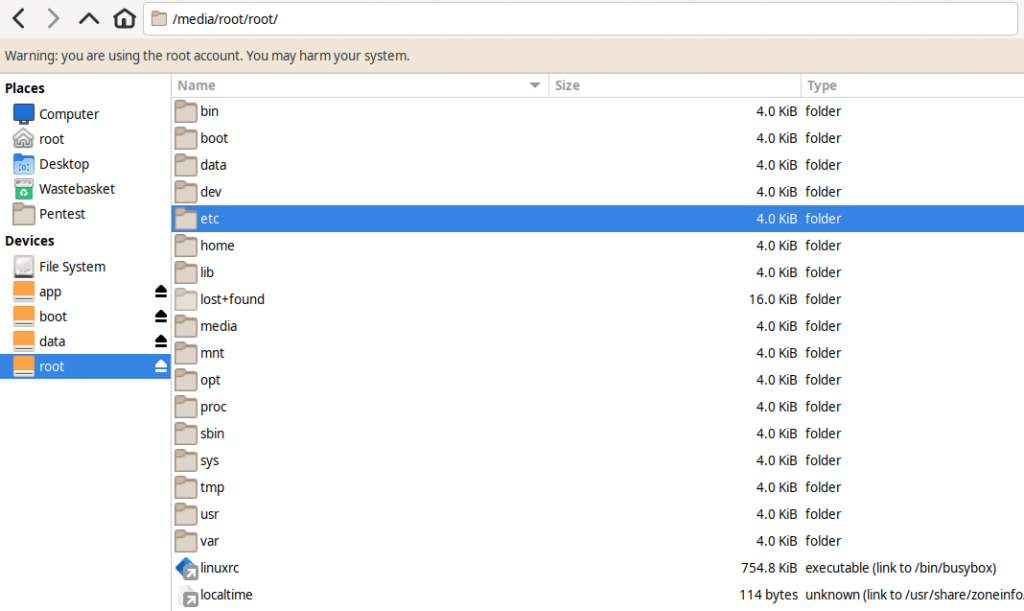
I then try the SD card in a linux machine and can see all 4 partitions.
Partitions:
app – encrypted blob
boot – accessible, boot image and config files
data – encrypted blob
root – linux filesystem
Now I could edit /etc/passwd on the “Root” SD card filesystem, I changed medtronic to user / group 0, reinstalled the SD card, booted the system and logged in with “medtronic” with no password and was greeted with:
root@Vega1:/home/medtronic# iduid=0(root) gid=0(root) groups=0(root)root@Vega1:/home/medtronic# uname -aLinux Vega1.2.4p 3.0.3.ti-omap3-beagle-2.6.29 #19 PREEMPT Tue Jul 9 13:57:40 CDT 2019 armv7l unknown |
Woop Woop I now have root access to the device!
Further software analysis
Although the “data” and “app” folders are encrypted at rest, now with a root shell they are browsable like normal directories. I was expecting some PII, but there was not on this device I bought from ebay, I’m not sure if that’s because none is stored on it in these encrypted folders or because I got a previously unused device. Either way there wasn’t much interesting in these encrypted folders, some apps and some config files but nothing of note!
The device did have some interesting processes that auto-start in boot, I have yet to reverse them but that would definitely be the next course of action.:
/usr/bin/mono /usr/lib/mono/2.0/mono-service.exe -l:/var/run/tc.pid TcpIpTCService.exe/opt/medtronic/bin/audiod/opt/medtronic/bin/inputd/opt/medtronic/bin/lcdd/opt/medtronic/bin/nvmemoryd/opt/medtronic/bin/swupdated |
linenum and linpeas were run to find some interesting things that have yet to be explored. There were some hardcoded URL’s and IP addresses in network config files.
Encryption key
The file “/home/root/.ecryptfs/sig-cache.txt” contains “d3dc25a49f392a16”. This has to do with the encrypted folders on the SD card and shows they are encrypted with eCryptfs (a stacked filesystem for Linux).
Lets get that key!
root@Vega1:/home/medtronic# keyctl showSession Keyring -3 --alswrv 0 0 keyring: _ses root@Vega1:/home/medtronic# keyctl list @us1 key in keyring:337948780: --alswrv 0 -1 keyring: _uid.0root@Vega1:/home/medtronic# keyctl list @skeyring is emptyroot@Vega1:/home/medtronic# keyctl list 3379487801 key in keyring:537071990: --alswrv 0 0 user: d3dc25a49f392a16root@Vega1:/home/medtronic# keyctl describe 537071990537071990: als-rvalswrv------------ 0 0 user: d3dc25a49f392a16root@Vega1:/home/medtronic# keyctl read 537071990740 bytes of data in key:04000000 00000000 00000000 00000000 00000000 00000000 00000000 0000000000000000 00000000 00000000 00000000 00000000 00000000 00000000 0000000000000000 00000000 00000000 00000000 00000000 00000000 00000000 0000000000000000 00000000 00000000 00000000 00000000 00000000 00000000 0000000000000000 00000000 00000000 00000000 00000000 00000000 00000000 0000000000000000 00000000 00000000 00000000 00000000 00000000 00000000 0000000000000000 00000000 00000000 00000000 00000000 00000000 00000000 0000000000000000 00000000 00000000 00000000 00000000 00000000 00000000 0000000000000000 00000000 00000000 00000000 00000000 00000000 00000000 0000000000000000 00000000 00000000 00000000 00000000 00000000 00000000 0000000000000000 00000000 00000000 00000000 00000000 00000000 00000000 0000000000000000 00000000 00000000 00000000 00000000 00000000 00000000 0000000000000000 00000000 00000000 00000000 00000000 00000000 00000000 0000000000000000 00000000 00000000 00000000 00000000 00000000 00000000 0000000000000000 00000000 00000000 00000000 00000000 00000000 00000000 0000000000000000 00000000 00000000 00000000 00000000 00000000 00000000 0000000000000000 00000000 00000000 00000000 00000000 00000000 00000000 0000000000000000 00000000 00000000 00000000 00000000 00000000 00000000 0000000000000000 00000000 00000000 00000000 00000000 00000000 00000000 0000000000000000 00000000 00000000 00000000 00000000 00000000 0a000000 0000000040000000 02000000 83f76744 ade8641a 8e3a3385 c8498324 46f2babd 5772bb4443e99124 743abf61 927eee05 1a90db98 14426bc1 b004644d 4124a072 89fe8808b517ca8f 744319ec 64336463 32356134 39663339 32613136 00001122 3344556677000000 |
Lets double check the encrypted file systems:
root@Vega1:/home/medtronic# mount | grep ecryptfs/data on /data type ecryptfs (rw,relatime,ecryptfs_fnek_sig=d3dc25a49f392a16,ecryptfs_sig=d3dc25a49f392a16,ecryptfs_cipher=aes, ecryptfs_key_bytes=16,ecryptfs_passthrough,ecryptfs_unlink_sigs)/opt on /opt type ecryptfs (rw,relatime,ecryptfs_fnek_sig=d3dc25a49f392a16,ecryptfs_sig=d3dc25a49f392a16,ecryptfs_cipher=aes, ecryptfs_key_bytes=16,ecryptfs_passthrough,ecryptfs_unlink_sigs) |
With that you can now mount the file systems on your own linux host.
Future plans
This blog is getting long, but at least shows a starting point, and overview of the device and how to get root. Next steps would be reversing the apps, specifically the ones automatically started that seem custom to the device. A deep dive into the OS to look for hard coded keys or backdoors (busybox is notorious for these). It would be good to see how it communicates to the handset (I suspect via bluetooth and use the 4g dongle to talk to the backend – this needs confirming though). The handset also needs reversing as that is a separate device with it’s own processor etc.
Overall this has been fun, and I hope you have enjoyed this and learnt something.
