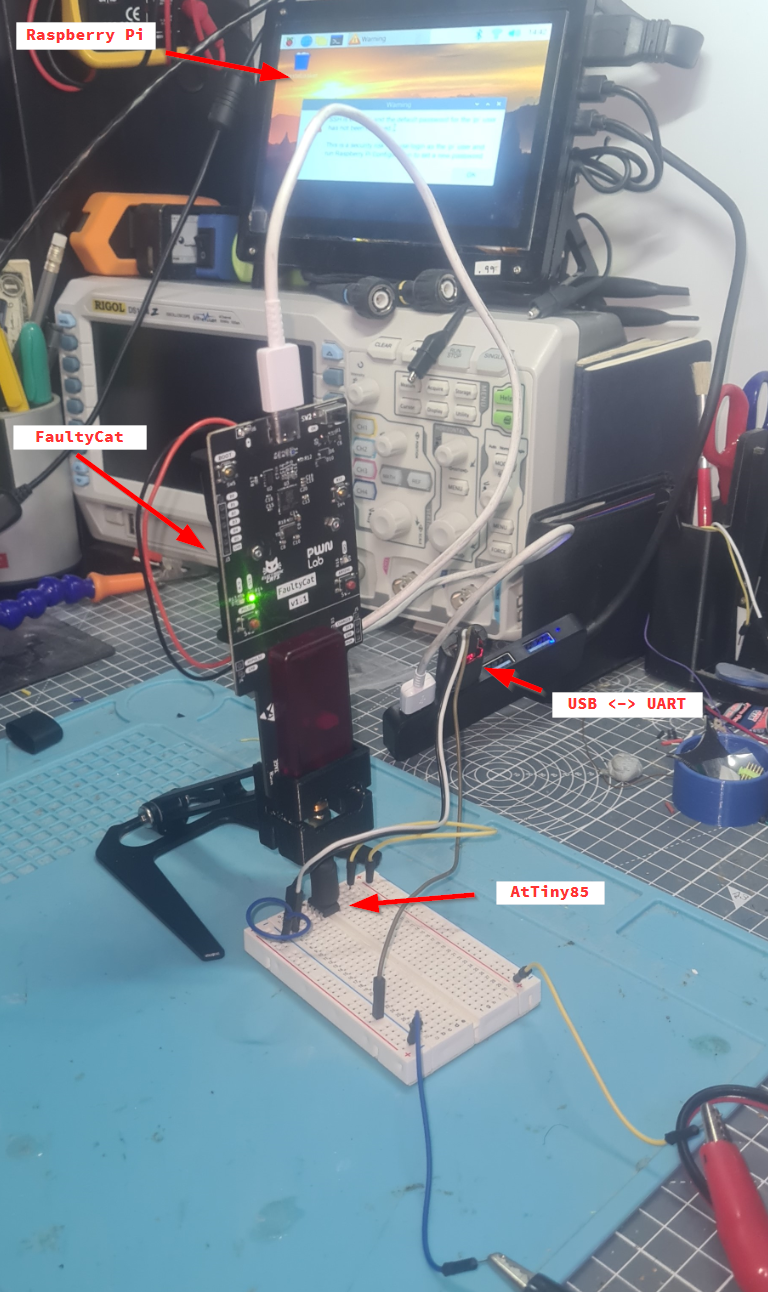
At the most recent Defcon (32) along with too many badges I purchased a “FaultyCat”. A small EMFI injection device. It’s a remix of the “PicoEMP”. Basically you charge up some capacitors (under the red plastic in the below photo), then when you are ready discharge them through the tip on the right to have a highly targeted EM pulse wherever you direct it (typically over a processor chip). This is just going to be a small blog on how I tested mine, experiments I did to check and learn how it works.

All the code for this is available here: https://rossmarks.uk/git/0xRoM/Hardware
Chip Restarting
The first thing to do is just get the device to send a pulse and restart the chip.
I started by programming an ATtiny85 to simply echo over serial “Initializing…” when it first turns on then in a loop “running” so we have an indication that the chip isnt dead.
In the repo this is in “/FaultInjection/examples/FaultyCat/01_simple_restart/”.
I have previously made a holder for the FaultyCat (https://thingiverse.com/thing:6753548 ) and it made this whole project a LOT easier as an important part of this is working out where to position the FaultyCat over the chip. This will take trial and error, just try to move in small increments until you get the result you want.
My setup looked like this:
The wiki (https://github.com/ElectronicCats/faultycat/wiki) is fairly barebones, however I found it has all that was needed to get this working.
For this example check the “FaultyCMD” section of the wiki, it’s fairly simple, set the config values then send start. I did find that I was unable to change the power level. Move the device to different locations on the chip to find the best place to send the pulse. Once you have it should look as follows:
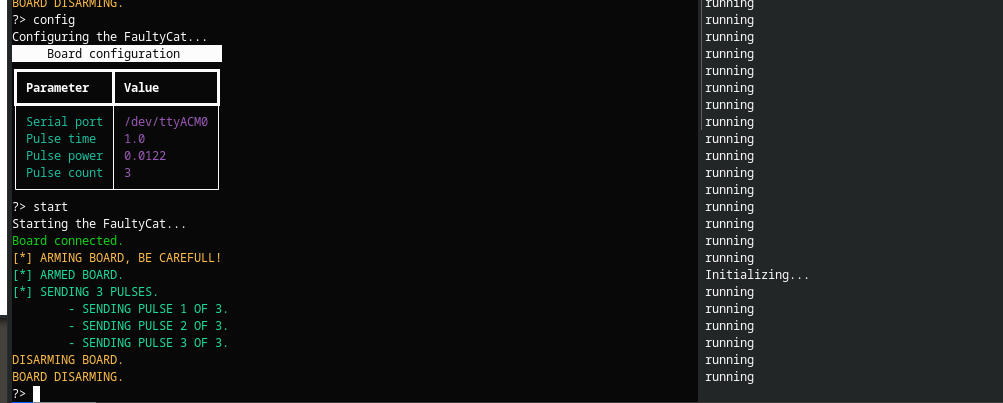
Where it says “Initializing…” is where the chip restarted due to the FaultyCat zapping the ATtiny85.
Number Comparison
As cool as restarting the chip is, it’s not very useful. Typically here you would lower the power a little bit at a time until it would no longer restart the chip, but as mentioned before that didnt work for me, instead I moved the FaultyCat to a different location on the ATtiny85 that didnt cause a restart, I also raised the tip in the hope it lost some of the power reaching the chip. The idea of lowering the power so it no longer restarts is in the hope that instead it would mess with the chip but keep it alive, this could be by flipping a bit in memory or causing it to skip an instruction, or some other weird wonderful thing.
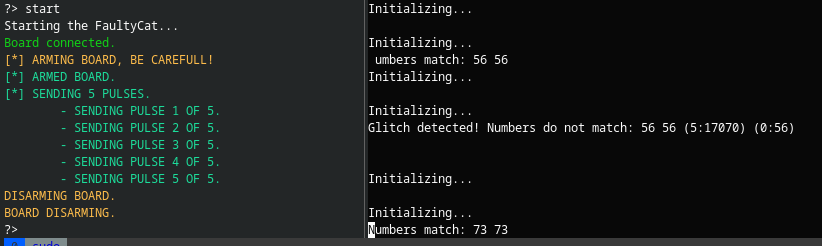
For this demo flash “/FaultInjection/examples/FaultyCat/02_match_numbers/” onto the ATtiny85. This script generates a random number, sets variable A to that number and variable B to the same number. It then performs some operations on the numbers (to waste time essentially, allowing for a glitch to occur) before checking that A == B, which it always should. As you might expect the following happened:
Password Protection
Now the real fun begins. To start with you will want to flash “/FaultInjection/examples/FaultyCat/03_password_check/” to the ATtiny85. This is another very simple program, it’s output will start with “[-]” if you are not logged in or “[+]” if you are. The program will respond “pong” if you send it “ping” otherwise it presumes your input is a password attempt, which if wrong it will reply with “Password incorrect” otherwise you have the correct hardcoded password and it will reply “Password correct”. Theres some delays and operations in there to emulate if it was comparing against a hash and having to perform extra operations.
In the “03_password_check” folder there is also “attack.py” this script is what interacts with the FaultyCat and the ATtiny85 to perform the injection. This is also very basic. It arms the Faultycat, then sends “ping” to the chip to ensure it is alive and working as expected. if it gets a “pong” response it then sends “incorrectpassword” to the chip and very quickly (basically at the same time) a FaultyCat pulse to the chip, it does this 5 times really fast before checking “ping” response again. between each password attempt it checks to see if the response is “correct” but not “incorrect”, if it is then everything stops because we would have gained access.
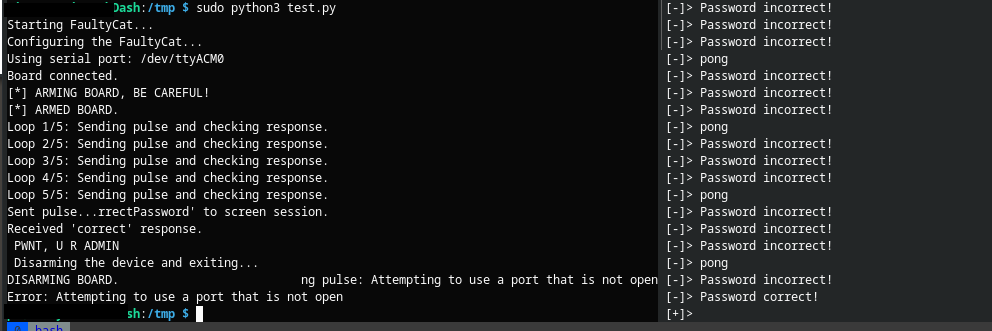
So now everything is setup and ready to go I run the script and:
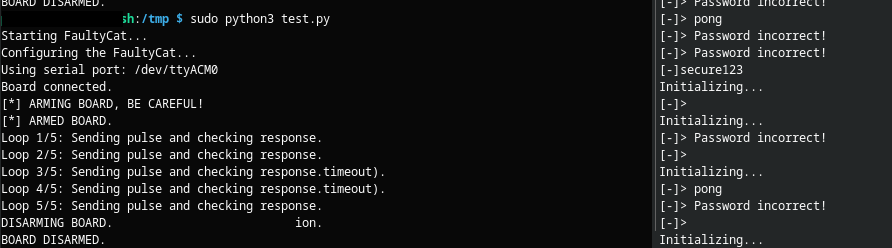
Well that was unexpected, as you can see in the right screen, it echoed the password! The theory is, it put the password into memory for comparing, it compared as incorrect, it then tried to put “password incorrect” into the same memory location but the FaultyCat made it skip that instruction, the next instruction being to print that memory location, where instead of printing “incorrect password” the only thing it could print was the password. Of course this is just a guess.
Eventually it did bypass the comparison and we get:
YEY we gained access, game over, I win!
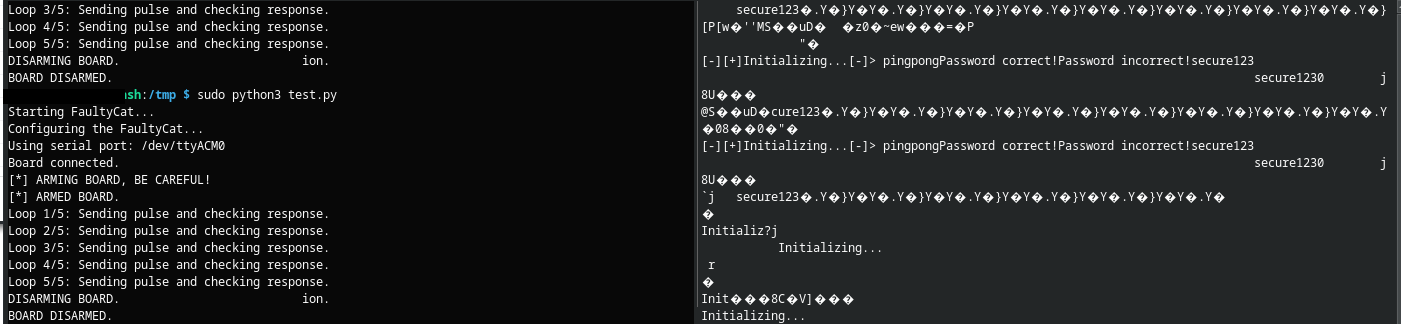
I never broke the ATtiny85 throughout these experiments, although sometimes did require it to be disconnected and reconnected, the timer would get hit and everything run crazy fast or just junk getting dumped to the screen. Here is a typical example, you can also see the password in the junk dumped to screen:
Overall this was a fun attack and another tool under the belt, I have definitely caught the glitching bug and have some voltage glitching hardware on the way so expect more content around this.
I hope you have learned something from this.
Until next time.
